How to deploy a MySQL Cluster from Scratch with Docker

docker-mysql

[Image source : http://www.nanoshots.com.br/2017/01/docker-restaurando-dumps-em-containers.html]

Hi,

Today, let’s see how to deploy, a MySQL cluster with Docker, and connect to the nodes from our local machine.

Read more on MySQL Cluster : MySQL Cluster Reference Manual

Here I’m going to create 1 Management node, 2 Data nodes and 2 SQL nodes. Basically the nodes in the cluster are running on separate hosts in a network. So we create a network in docker and connect the containers to the network. Let’s get started.

Before we start makesure that you have installed docker in your machine. If not go ahead and install docker and get familier with it. This documentation will help you.

Step 1: Create the docker network.

Open the terminal and run the following docker command.

docker network create cluster --subnet=10.100.0.0/16

You can define your own subnet for this.

Step 2: Get the mysql docker  repository

This step is not mandetory. I do this because I need to use different sub net other than the default one.

  1. Clone the mysql docker repository. git clone https://github.com/mysql/mysql-docker.git
  2. Checkout the mysql-cluster branch
  3. Open mysql-docker/7.5/cnf/mysql-cluster.cnf
  4. By default mysql-cluster.cnf is configured to use a single mysql node. Also the ip addresses are configured. Change the ip addresses of each node to match the subnet.
    For example, here is how my configuration looks like…

    [ndb_mgmd]
    NodeId=1
    hostname=10.100.0.2
    datadir=/var/lib/mysql
    
    [ndbd]
    NodeId=2
    hostname=10.100.0.3
    datadir=/var/lib/mysql
    
    [ndbd]
    NodeId=3
    hostname=10.100.0.4
    datadir=/var/lib/mysql
    
    [mysqld]
    NodeId=4
    hostname=10.100.0.10
    
    [mysqld]
    NodeId=5
    hostname=10.100.0.11
  5.  Open mysql-docker/7.5/cnf/my.cnf and modify the ndb-connectstring to match the ndb_mgmd node.
    [mysqld]
    ndbcluster
    ndb-connectstring=10.100.0.2
    user=mysql
    
    [mysql_cluster]
    ndb-connectstring=10.100.0.2
  6. Build the docker image.
    docker build -t <image_name> <Path to docker file>
    
    docker build -t mysql-cluster mysql-docker/7.5

After successfully completing this step, we can start creating the necessary nodes for our cluster.

Step 3: Create the manager node.

We create manager node with the name, management1 and ip: 10.100.0.2.

docker run -d --net=cluster --name=management1 --ip=10.100.0.2 mysql-cluster ndb_mgmd

Step 4: Create the data nodes

docker run -d --net=cluster --name=ndb1 --ip=10.100.0.3 mysql-cluster ndbd
docker run -d --net=cluster --name=ndb2 --ip=10.100.0.4 mysql-cluster ndbd

Step 5: Create the sql nodes.

docker run -d --net=cluster --name=mysql1 --ip=10.100.0.10 -e MYSQL_RANDOM_ROOT_PASSWORD=true mysql-cluster mysqld
docker run -d --net=cluster --name=mysql2 --ip=10.100.0.11 -e MYSQL_RANDOM_ROOT_PASSWORD=true mysql-cluster mysqld

Just to check whether is everything worked correctly, run

docker run -it --net=cluster mysql-cluster ndb_mgm

The cluster management console will be loaded.

[Entrypoint] MySQL Docker Image 7.5.7-1.1.0
[Entrypoint] Starting ndb_mgm
-- NDB Cluster -- Management Client --
ndb_mgm>

Run show command and you will see the following out put.

ndb_mgm> show
Connected to Management Server at: 10.100.0.2:1186
Cluster Configuration
---------------------
[ndbd(NDB)] 2 node(s)
id=2 @10.100.0.3 (mysql-5.7.19 ndb-7.5.7, Nodegroup: 0, *)
id=3 @10.100.0.4 (mysql-5.7.19 ndb-7.5.7, Nodegroup: 0)

[ndb_mgmd(MGM)] 1 node(s)
id=1 @10.100.0.2 (mysql-5.7.19 ndb-7.5.7)

[mysqld(API)] 2 node(s)
id=4 @10.100.0.10 (mysql-5.7.19 ndb-7.5.7)
id=5 @10.100.0.11 (mysql-5.7.19 ndb-7.5.7)

OK, it’s working. Back to work. 🙂

Now let’s configure our mysql nodes so that we can login to them remotely and create the data bases.

Step 7. Change the default passwords.

When the sql nodes are created initially, a random password is set. To get the default password,tt,

docker logs mysql1 2>&1 | grep PASSWORD

To change the password, run the following command and login to the mysql node.

docker exec -it mysql1 mysql -uroot -p

Copy and paste the password from the previous command and press enter.

Now you will be logged in to the mysql node1. Change the password of the root user.

ALTER USER 'root'@'localhost' IDENTIFIED BY 'root';

To login from a different host,

GRANT ALL PRIVILEGES ON *.* TO 'root'@'%' IDENTIFIED BY 'root' WITH GRANT OPTION;
FLUSH PRIVILEGES;

exit from the node1 and do the same for the mysql node 2 as well.

Step 8: Login and create a new database.

Let’s try to login to the mysql node from our local machine.

Run the following command with respective ip, user and password.

mysql -h10.100.0.10 -uroot -p
.
.
.
mysql>

It’s working. 🙂

Just to check the cluster functionality, create a new database in one mysql node.

CREATE SCHEMA TEST_DB;

mysql> create schema test_db;
Query OK, 1 row affected (0.04 sec)

Now login to the other mysql node and run

SHOW DATABASES;

mysql> show databases;
+--------------------+
| Database           |
+--------------------+
| information_schema |
| mysql              |  
| ndbinfo            |
| performance_schema |
| sys                |
| test_db            |
+--------------------+
8 rows in set (0.00 sec)

You can see the same database has created in the node as well.

Cheers!

Configuring Tomcat for SSL….

Hi,

In this article let’s look at how to configure Apache Tomcat to use SSL.

In order to configure the Tomcat srever, first we need to generate a Key Store, which will be used by tomcat for SSL. We can use the Java keytool to generate a Keystore jks file. Invoke the following command with relevent parameters to create the keystore.

keytool -genkey -keyalg RSA -alias <alias> -keystore <name_of_the_keystore>.jks -storepass <password> -validity 360 -keysize 2048

Here is the parameters as per my example.

  • alias : tomcat
  • key store name: Keystore

After executing the above command we can see a new Keystore.jks file has been created.

Configure tomacat to use the new Keystore.jks

Open the server.xml file in <TOMCAT_HOME>/conf directory and find and uncomment the following connector configuration.

<Connector port="8443" protocol="org.apache.coyote.http11.Http11Protocol"
maxThreads="150" SSLEnabled="true" scheme="https" secure="true"
clientAuth="false" sslProtocol="TLS" />

Then modify the above connector configuration and add the keystore file that we created. After all the configurations, it will be look like following.

<Connector port="8443" 
     protocol="org.apache.coyote.http11.Http11Protocol"
     maxThreads="150" 
     SSLEnabled="true" 
    scheme="https" 
    secure="true"
    clientAuth="false"
    sslProtocol="TLS" 
    keystoreFile="<path to your key store.jks>" 
    keystorePass="<password>" />

Start the server by running startup.sh.

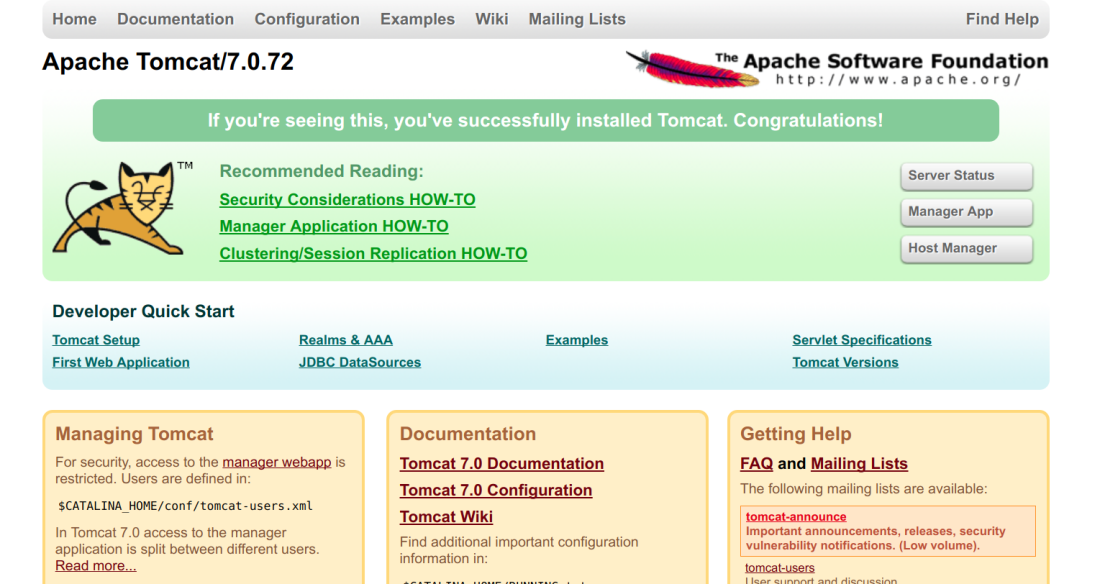
Now in the browser go to https://localhost:8443 and you will see the following security exception.

Go ahead and accept the security exception and then we can see the tomcat landing page.

Screenshot (5-2)

Happy coding…!!!

Thanks

Sending the Actual User-Agent to the Backend : WSO2 API Manager.

Hi,

In this article, we are going to talk about a simple trick in WSO2 API Manager. Let’s get started… 🙂

When invoking an API which is published through the WSO2 API Manager, here is the request that is actually sent to the back end.

[2017-11-24 23:43:34,716] DEBUG - headers http-outgoing-1 >> GET /RESTfulExample/rest/hello/name/get HTTP/1.1
[2017-11-24 23:43:34,717] DEBUG - headers http-outgoing-1 >> Host: 10.100.5.138:8080
[2017-11-24 23:43:34,717] DEBUG - headers http-outgoing-1 >> Connection: Keep-Alive
[2017-11-24 23:43:34,717] DEBUG - headers http-outgoing-1 >> User-Agent: Synapse-PT-HttpComponents-NIO

As you can see the user agent is set as Synapse-PT-HttpComponents-NIO which is the WSO2 API Gateway. Let’s take a look at the request that we sent.

[2017-11-24 23:43:34,708] DEBUG - headers http-incoming-2 >> GET /test/v1.0/get HTTP/1.1
[2017-11-24 23:43:34,709] DEBUG - headers http-incoming-2 >> Host: 10.100.5.138:8243
[2017-11-24 23:43:34,709] DEBUG - headers http-incoming-2 >> User-Agent: curl/7.47.0
[2017-11-24 23:43:34,709] DEBUG - headers http-incoming-2 >> Accept: text/html
[2017-11-24 23:43:34,709] DEBUG - headers http-incoming-2 >> Authorization: Bearer xxxxx
So, there you can see the actual User-Agent that invoke the api. That is a cURL.
What could we do to send the actual user agent to our backend?
It’s very simple as 1, 2, 3
  1. Open passthru-http.properties file in <APIM-HOME>/repository/conf in a text editor.
  2. Uncomment http.user.agent.preserve and set the value to true.
  3. Save the file and restart the server…

Done.

So next time when invoking the API, here is the result we got…

[2017-11-28 17:10:40,680] DEBUG - headers http-outgoing-1 >> GET /RESTfulExample/rest/hello/name/get HTTP/1.1
[2017-11-28 17:10:40,680] DEBUG - headers http-outgoing-1 >> Accept: application/json
[2017-11-28 17:10:40,680] DEBUG - headers http-outgoing-1 >> User-Agent: curl/7.47.0
[2017-11-28 17:10:40,680] DEBUG - headers http-outgoing-1 >> Host: 10.100.5.138:8080
[2017-11-28 17:10:40,680] DEBUG - headers http-outgoing-1 >> Connection: Keep-Alive

You can see that in this request, which is going to the backend from the gateway, the user agent is the actual agent that invoked the API.

And do not forget to download the WSO2 API Manager and explore its cool features from this link.

Thanks…

How to find and remove files in Ubuntu.

Hi,

Sometimes we want to find the files that are not needed and remove all of them. But instead of removing one by one, we can do it very easily with one command.

Workflow.

I needed to remove all the .iml files in my project for a deployment. So I executed a find command.

find . -name '*.iml' 

./SenseMe/feature/feature/org.wso2.iot.senseme.feature.iml
./SenseMe/feature/senseme-feature.iml
./SenseMe/senseme.iml
./SenseMe/component/plugin/org.wso2.iot.senseme.plugin.iml
./SenseMe/component/ui/org.wso2.iot.senseme.ui.iml
./SenseMe/component/api/org.wso2.iot.senseme.api.iml
./SenseMe/component/senseme-component.iml
./SenseMe/component/analytics/org.wso2.iot.senseme.analytics.iml'

Now, I want to remove these files.

rm ./SenseMe/feature/feature/org.wso2.iot.senseme.feature.iml

Repeat for all the other files. It’s not a big issue as I have only 8 files. But in real cases where there are 100s of files, it is a real headache.

rm ./SenseMe/feature/senseme-feature.iml
rm ./SenseMe/senseme.iml
rm ./SenseMe/component/plugin/org.wso2.iot.senseme.plugin.iml
rm ./SenseMe/component/ui/org.wso2.iot.senseme.ui.iml
rm ./SenseMe/component/api/org.wso2.iot.senseme.api.iml
rm ./SenseMe/component/senseme-component.iml
rm ./SenseMe/component/analytics/org.wso2.iot.senseme.analytics.iml

But, there is an easy way to do this. How easy is it? Well, you only have to write one line of commands. 🙂

find . -name '*.iml' -exec rm {} \;

UPDATE : Replaced \ ; with \;
There should be no space between \ and ;.

What is does?

  • find . -name ‘*.iml’ :-  Find in the current directory for files which matches the given pattern.
  • -exec rm {}  \  ;  :-  Executes rm command on each of the results from find command.

Note:

You can use standard ways of find and rm commands and -exec does the execution.

Examples:

Find all files in a directory and remove them.

find . -type f -name 'File Name Pattern' -exec rm {} \ ;

Find directories and remove them

find . -name 'File/ Dir Name Pattern' -exec rm -rf {}  \ ;

For more info: please refer command reference for find and rm.

Cheers.


How to specify the web browser manually in selenium testing.

Hay,

In this short article, I would like to show you how to specify a custom web browser when running UI integration tests using selenium.

This extremely necessary when the webDriver does not support the current version of particular web browser.

In situations like this what we normally do is, uninstall the current version of web browser and install the older version. Then we have to use that browser or any other browser for our day-to-day works. It’s annoying sometimes.

So with this method, we do not want to uninstall the current browser that we have.


Here are the steps. (for firefox and maven build)

  • Download the required version of web browser. (in my case it was Mozilla Firefox v31).
  • Extract it.
  • Add the following parameters to your maven build.
     -Dwebdriver.firefox.bin=path_to_firefox/firefox
    Ex:
     mvn clean install  -Dwebdriver.firefox.bin=/home/menaka/firefox/firefox

    Cheers….

How to create a simple XML structure in Java?

Hi guys,

Here I create a simple XML structure in Java.

There are several methods to create an XML file in Java.

  1. Using Java Document builder
  2. Using 3rd party libraries
  3. Serializing Java object to xml  etc.

Here I use Java DocumentBuilder to create the following xml.

<bookstore>  
   <books>      
      <book>
            <name>Book_A</name>
            <author>Author_A</author>
            <isbn>abcdefg123456</isbn>
        </book>
   </books>
</bookstore>

Here is the Java code to create the above XML.

public static void main(String args[]) {
    try {
        DocumentBuilderFactory docBuilderFactory = DocumentBuilderFactory.newInstance();
        DocumentBuilder docBuilder = docBuilderFactory.newDocumentBuilder();

        /**
         * Starts the root element.
         * 
         * 
         * */
        Document doc = docBuilder.newDocument();
        Element root = doc.createElement("bookstore");
        doc.appendChild(root);

        /**
         * Creating books element.
         * */
        Element books_element = doc.createElement("books");
        root.appendChild(books_element);

        /**
         * Create individual book
         * */
        Element book = doc.createElement("book");
        books_element.appendChild(book);

        /**
         * Adding book properties
         * */
        Element title = doc.createElement("name");
        title.appendChild(doc.createTextNode("Book_A"));
        book.appendChild(title);

        Element author = doc.createElement("author");
        author.appendChild(doc.createTextNode("Author_A"));
        book.appendChild(author);

        Element isbn = doc.createElement("isbn");
        isbn.appendChild(doc.createTextNode("abcdefg123456"));
        book.appendChild(isbn);

        /**
         * Writes the content of the doc to a XML file.
         * */
        TransformerFactory transformerFactory = TransformerFactory.newInstance();
        Transformer transformer = transformerFactory.newTransformer();
        DOMSource source = new DOMSource(doc);
        StreamResult result = new StreamResult(new File("bookstore.xml"));
        transformer.transform(source, result);

        /**
         * Writes the result to console. (System.out)
         * */
        StreamResult res = new StreamResult(new OutputStreamWriter(System.out));
        transformer.transform(source, res);

    } catch (TransformerConfigurationException e) {
        e.printStackTrace();
    } catch (TransformerException e) {
        e.printStackTrace();
    } catch (ParserConfigurationException e) {
        e.printStackTrace();
    }
}

The result will be written to bookstore.xml.

Spring Boot – How to create a simple Spring Boot project in IntelliJ IDEA?


Hi,

There are several ways to create a Spring Boot application.

  1. Through web-based interface
  2. Via Spring Tool Suit
  3. Via IntelliJ IDEA
  4. From Spring Boot CLI

Let’s take a look at how to start creating Spring Boot applications using IntelliJ IDEA. Here I’ll show you some quick and easy steps to do it.

For this you will need IntelliJ IDEA commercial edition as the community edition does not give you these functionalities.

Ok. Let’s get started.

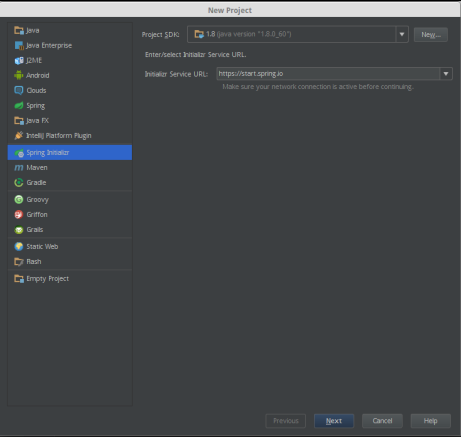
  1. Open New Project dialog box by File -> New -> ProjectScreenshot from 2016-02-04 18:41:19
  2. Choose Spring Initialize from the left and click next
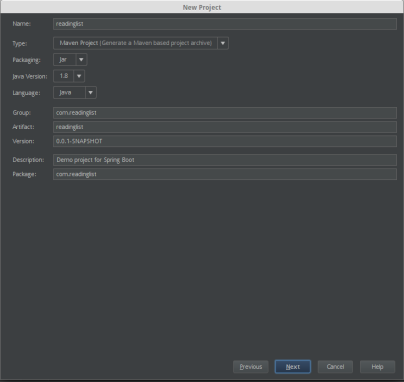
  3. Enter the following information.
    1. Name
    2. Type : There are 4 types. (Here I select Maven Project)
      1. Maven Project
      2. Maven POM
      3. Gradle Project
      4. Gradle Config
    3. Packaging : Whether you want to build a war or a jar file
    4. Java version
    5. Language : Two options (Java and Groovy)
    6. Then give group id, artifact id and version for your Maven project
    7. Give description and package name and click Next.Screenshot from 2016-02-04 18:42:09
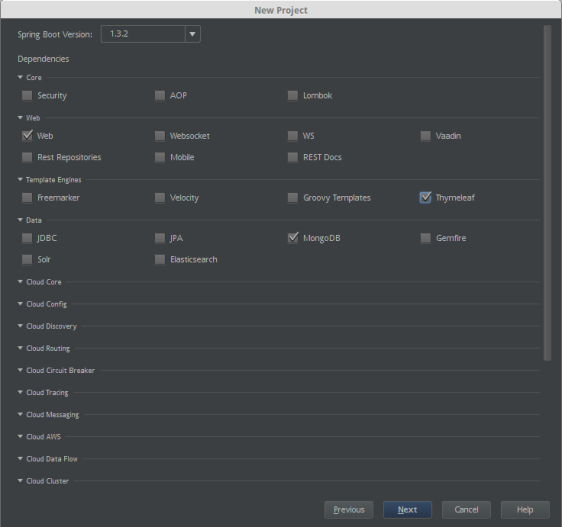
  4. In next window you can select the dependencies that you want to use in your project. There is a huge list of dependencies. Go through them and select what you need and click Next.Screenshot from 2016-02-04 18:42:29
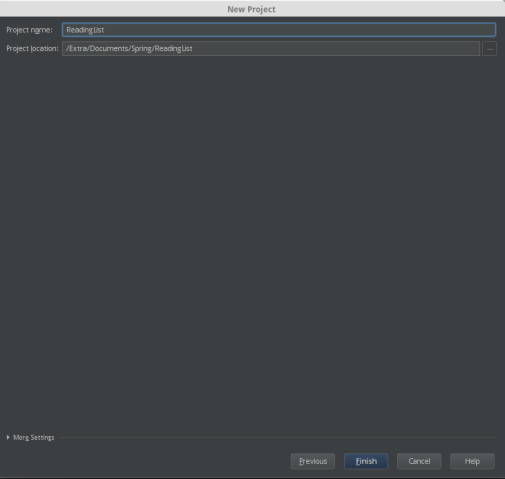
  5. In the next dialog give the project name and location and click Finish.Screenshot from 2016-02-04 18:42:47
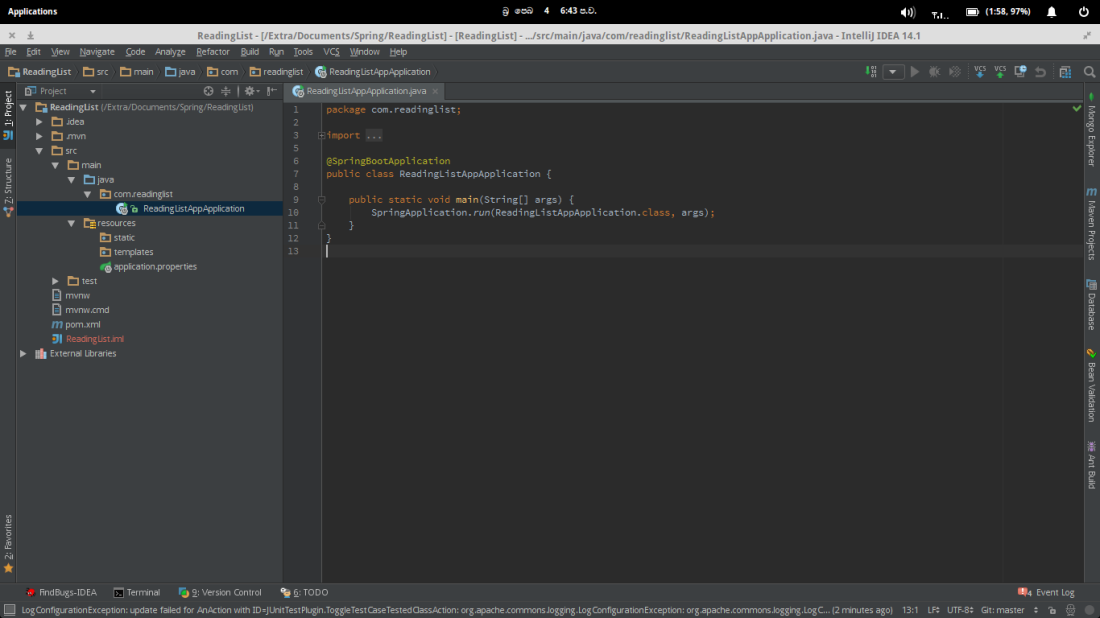
  6. That’s it. Now IDEA will create a new Spring Boot project for you.Screenshot from 2016-02-04 18:43:02

As this is a Maven project IDEA will download the necessary dependencies and you are ready to go.

Cheers….!!!

For more information:-

Visit Spring official web site.

How to access localhost via Android Emulator?

Some times we need to connect to a server running in our PC’s localhost, via android emulator for several reasons.

But we cannot access it by typing URL like,

http://localhost:portNo

This is impossible because, when ever we call localhost, it refers to the same system itself. So what is the URL that should be entered?

The correct URL is as follows….

http://10.0.2.2:portNo

According to the Android documentation, the ip address 10.0.2.2 is an alias to the loopback address of the host machine.


Apache Taverna Language Command Line Tool Documentation – Inspection

One of the main functionalities of the Taverna Language is “inspecting workflows”.

A workflow has several features.

There are processors, service types and etc.

The command line tool is capable of listing those features which are in a workflow bundle.

Supported workflow bundle formats :- .t2flow and .wfbundle

Usage

tavlang inspect <--options> <secondary_options> [arguments] input_files

Options

  • – – servicetypes – List the service types used in workflow
  • – -processornames – List a tree of processor names used in workflow

Secondary Options

  • -l, – – log – Save results in a log file

Example 1:

$tavlang inspect --servicetypes helloworld.wfbundle
Service types used in helloworld.wfbundle :

http://ns.taverna.org.uk/2010/activity/constant
**************************************************
$tavlang inspect --processornames helloworld.wfbundle
Processor tree of helloworld.wfbundle 
+ Hello_World
 - hello

Example 2:-

$tavlang inspect --processornames t2flow/as.t2flow
Processor tree of t2flow/as.t2flow 
+ Workflow1
 - Concatenate_two_strings
 - Concatenate_two_strings_2
 - Concatenate_two_strings_3
 - Concatenate_two_strings_4
 - Create_Lots_Of_Strings
 - Echo_List
 - String_constant
 + Workflow19
 - Concatenate_two_strings
 - String_constant
 - string1_value
$tavlang inspect --servicetypes /home/menaka/conv/aaa/workflows/t2flow/helloanyone.t2flow
Service types used in /home/menaka/conv/aaa/workflows/t2flow/helloanyone.t2flow :

http://ns.taverna.org.uk/2010/activity/beanshell
http://ns.taverna.org.uk/2010/activity/constant

**************************************************

Apache Taverna Language Command line tool documentation – Workflow Statistics

A workflow contains several resources.

  • Processors
  • Input ports
  • Output ports
  • Data links
  • Control links

The Taverna Language API (scufl2-api) has several methods to set and retrieve those resources when ever needed.

The command line tool is also capable of listing workflow file resources.

Usage:

$tavlang stats [options] input_files

Options:

  • -l, – – log : Save results in a log file
  • -v, – – verbose : verbose mode

Supported file formats: .t2flow and .wfbundle

Example usage: There are two modes of operations.

Verbose mode:

$tavlang stats -v ../../../helloworld.wfbundle
>>> Statistics of the workflow bundle: helloworld.wfbundle <<<
Name of the workflow = Hello_World
 |--> Number of Processors = 1
 | |--> Processors: 
 |      |--> hello
 |
 |--> Number of Data Links = 1
 | |--> Data Links
 |      |--> DataLink value=>greeting
 |
 |--> Number of Control Links = 0
 |--> Number of Input ports = 0
 |--> Number of Output Ports = 1
 | |--> Output Ports
 |      |--> OutputWorkflowPort "greeting"
$tavlang stats -v ../../../defaultActivitiesTaverna2.wfbundle
>>> Statistics of the workflow bundle: defaultActivitiesTaverna2.wfbundle <<<
Name of the workflow = Workflow1
 |--> Number of Processors = 21
 | |--> Processors: 
 |      |--> Beanshell
 |      |--> Nested_workflow
 |      |--> Rshell
 |      |--> Send_an_Email
 |      |--> SpreadsheetImport
 |      |--> String_constant
 |      |--> TavernaResearchObject
 |      |--> biomart
 |      |--> localWorker
 |      |--> localWorker_bytearray
 |      |--> mobyObject
 |      |--> mobyService
 |      |--> run
 |      |--> run_input
 |      |--> run_output
 |      |--> setWorkflows
 |      |--> soaplab
 |      |--> wsdl_document
 |      |--> wsdl_rpc
 |      |--> wsdl_secured
 |      |--> xmlSplitter
 |
 |--> Number of Data Links = 3
 | |--> Data Links
 |      |--> DataLink parameters=>input
 |      |--> DataLink output=>parameters
 |      |--> DataLink queryStatusOutput=>input
 |
 |--> Number of Control Links = 0
 |--> Number of Input ports = 0
 |--> Number of Output Ports = 0

Name of the workflow = Workflow4
 |--> Number of Processors = 1
 | |--> Processors: 
 |      |--> String_constant
 |
 |--> Number of Data Links = 2
 | |--> Data Links
 |      |--> DataLink value=>out0
 |      |--> DataLink in0=>out0
 |
 |--> Number of Control Links = 0
 |--> Number of Input ports = 1
 | |--> Input Ports
 |      |--> InputWorkflowPort "in0"
 |
 |--> Number of Output Ports = 1
 | |--> Output Ports
 |      |--> OutputWorkflowPort "out0"

Normal mode:

$tavlang stats ../../../helloworld.wfbundle
>>> Statistics of the workflow bundle: helloworld.wfbundle <<<
Name of the workflow = Hello_World
 |--> Number of Processors = 1
 |--> Number of Data Links = 1
 |--> Number of Control Links = 0
 |--> Number of Input ports = 0
 |--> Number of Output Ports = 1
$tavlang stats ../../../defaultActivitiesTaverna2.wfbundle
>>> Statistics of the workflow bundle: defaultActivitiesTaverna2.wfbundle <<<
Name of the workflow = Workflow1
 |--> Number of Processors = 21
 |--> Number of Data Links = 3
 |--> Number of Control Links = 0
 |--> Number of Input ports = 0
 |--> Number of Output Ports = 0

Name of the workflow = Workflow4
 |--> Number of Processors = 1
 |--> Number of Data Links = 2
 |--> Number of Control Links = 0
 |--> Number of Input ports = 1
 |--> Number of Output Ports = 1

Save results in a log file

Example:

$tavlang stats -l ../../results.txt ../../../helloworld.wfbundle
>>> Statistics of the workflow bundle: helloworld.wfbundle <<<
Name of the workflow = Hello_World
 |--> Number of Processors = 1
 |--> Number of Data Links = 1
 |--> Number of Control Links = 0
 |--> Number of Input ports = 0
 |--> Number of Output Ports = 1

Results were saved into ../../results.txt